Sweet Sewing

My kids often ask “Mom can we make a craft?”

“Can we do ___?”

Sometimes the answer is “Yes, of course we can make something!”

Other times, it’s “No we can’t today, I’m sorry!”

When my oldest daughter asks “Mom, I want to sew something, can we?”  The answer is always “YES!”  I’ve always enjoyed sewing and I am so excited to share it with my kids.  Spending time with my grandmother as a kid, she taught me to sew.  I learned to make clothes for my barbies, while she would make clothes for me.  I was in awe.   I received my first sewing machine for Christmas when I was in the sixth grade.  Intimidated by it at first, once I learned how to use it there was nothing that I would not try to make.

2014-03-23 02.08.55i

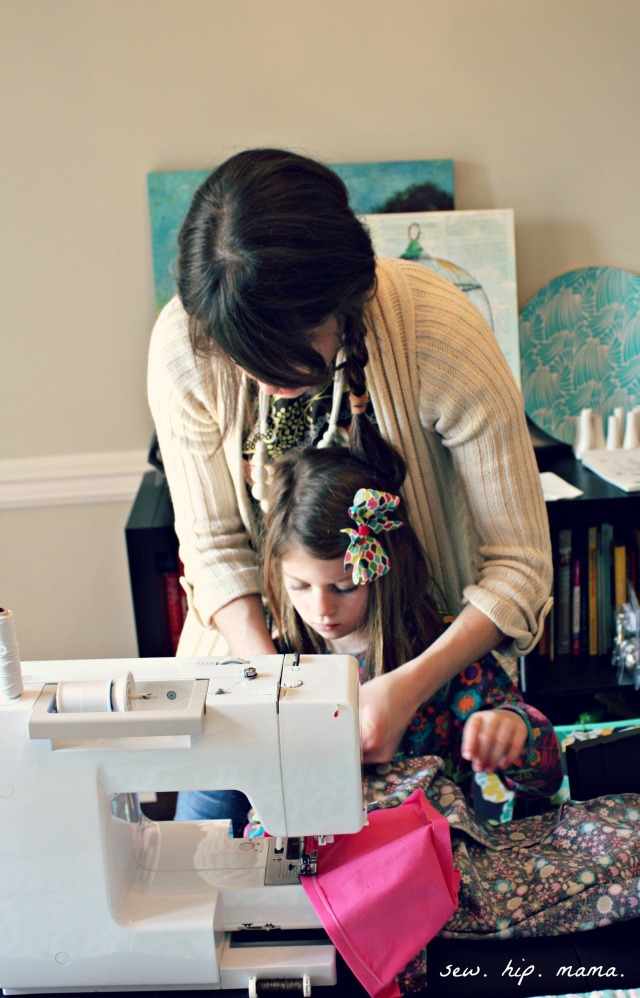
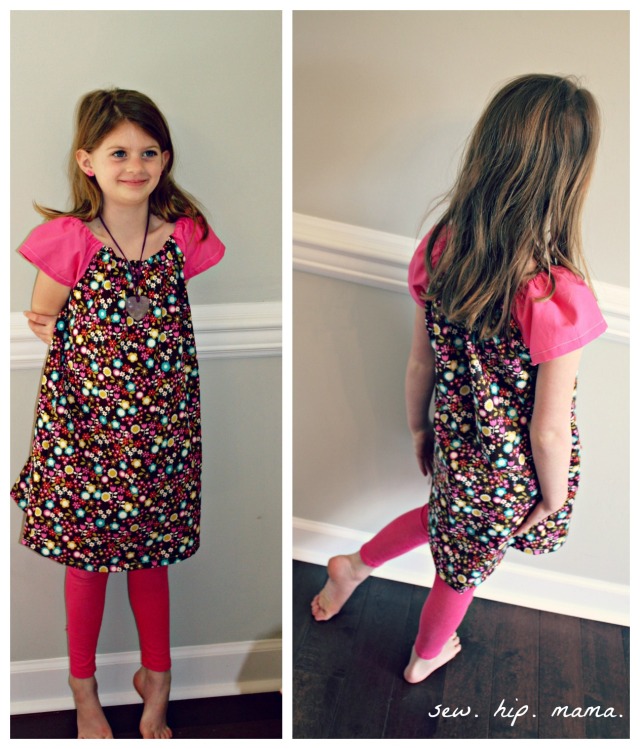
Sadie learned hand sewing last summer.  One of her favorite things that she made was a very cute little stuffed pink cat.  So it seemed like time to learn sew on a machine.  I’m looking forward to buying a sewing machine for her, a real one!  Not just one of those little toy ones.  We decided on a peasant dress.  They’re so easy and straightforward, seemed like a good starting point for her.  It’s not a project that I begin with when I give lessons to others, but I know her abilities and felt confident that she could do it.2014-03-23 02.09.31-2i
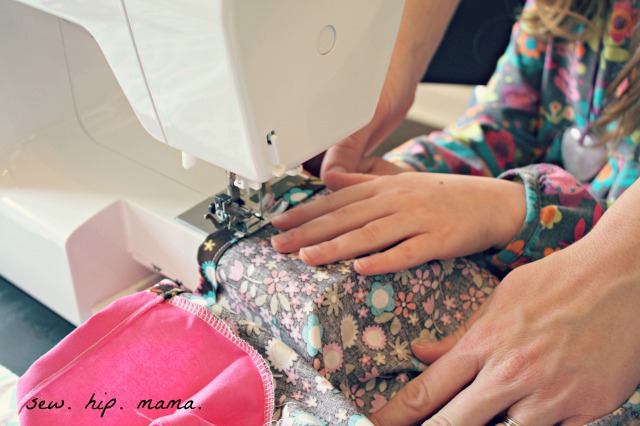
I can’t tell you how happy it made me to see her sewing, to see her confidence rising.  She was so proud to try on the dress that she made.  I was so proud to see her in it.  Isn’t she cute??

sadiesewscol

There are so many wonderful resources out there for making peasant dresses.  So many different style and takes on it.  I love them, they are so versatile.  Dress them up, dress them down.  Love them with leggings and boots!  Here are a few to try out.  Have fun, enjoy your creation!

Sweet Little Peasant Dress

Girls Peasant Dress

Com-pleat-ly Perfect Peasant Dress

Too Cute Ruched Shorts

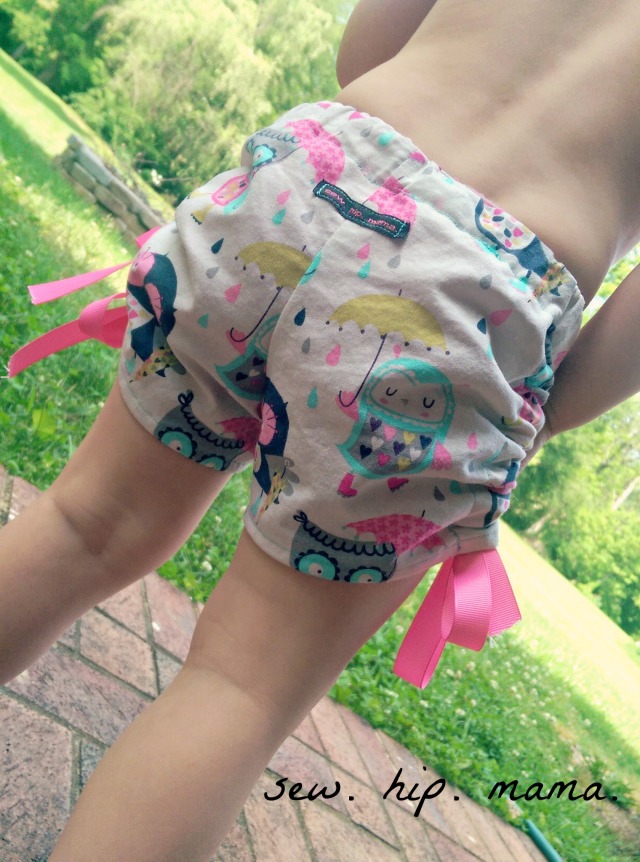
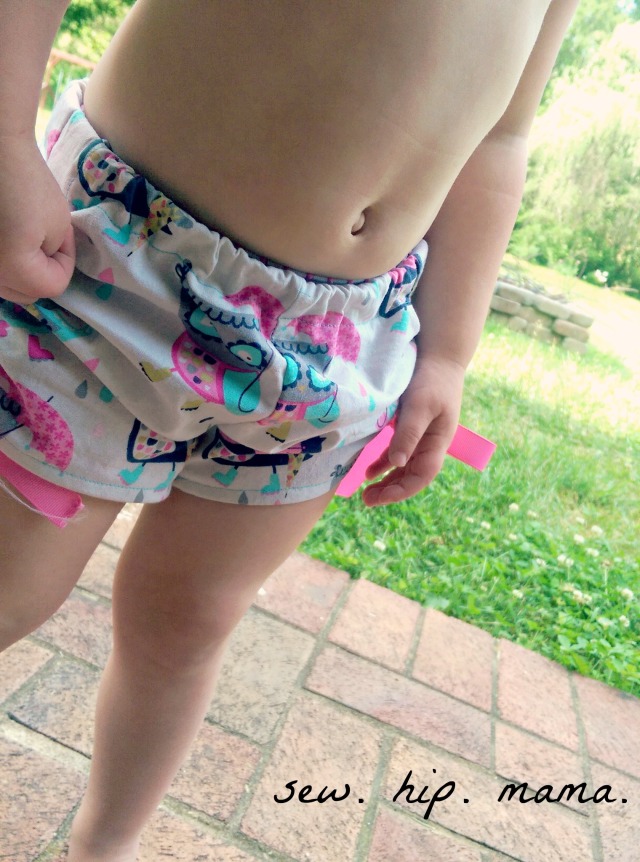
I found this adorable owl fabric at Joann’s back in March.  Having no idea what I was going to make with it,  I bought it because it was too fun to pass up.  Originally I was thinking a dress or a skirt.  At some point I ran across this pattern for cute ruched shorts.  It seemed like a perfect use for the fabric.  The pattern was so quick and easy that I ended up making a couple of pairs for both of my girls.  The ones pictured are on my two year old.  I loved that you can adjust the length!

2014-05-21 10.53.49


They are still a little big on her, but they’ll be great for next summer.  E approved of them, calling them her “hoo hoo” shorts.  The style really lends itself well to older and younger girls.  Truthfully, thought about making some for myself, but decided against it…for now.


2014-05-21 10.53.24If you’re looking for a quick and girlie shorts pattern this is the one for you.  Check it out, too cute ruched shorts by Coles Creations..

A little sewing

So this little girl should be here any day.  I’m trying to make all of my last minute preparations before her arrival.  I’ve yet to put a single thing on the walls, but I have finished a few other things for the room.

The crib skirt is made with Joel Dewberry’s Rose Bouquet in Sky, from his Heirloom collection.  I just made up my own pattern for the crib skirt.  The crib sheet is a flannel that I picked up at Joann. I made two of these flannel sheets, the other is a more of the magenta color that matches the flowers in the crib skirt fabric.  I used coordinating prints from the same collection throughout the room.

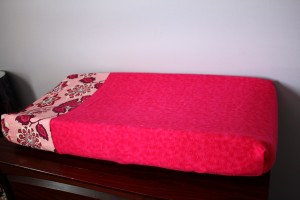
This is one of three changing pad covers that I finished.  Again, same fabric collection as above, the flannel was from Joann.  (Same flannel as the other crib sheet.)

The curtain was kind of a last minute decision.  I had originally planned to make long panels that had a variety of fabric strips along the bottom.  In the end this was the product of my imagination.  I totally winged this and just made it up as I went along!  I do like the way it looks. it adds a lightness to the room, which I think would not have happened with the panels.

Not pictured is a small quilt/blanket, two additional changing pad covers, an extra crib sheet and two pack ‘n play sheets.  Lots of sewing happening around here!  I’m trying to work up a tutorial for the pack ‘n play sheets.  They were really simple  to make, and didn’t use tons of fabric.  Hopefully we’ll see that in the next few days!!

Sorry for the inconsistency of colors in the pictures, they were taken at different times of the day.  I’ve found that the paint color tends to change depending on the hour.  It’s a Benjamin Moore color, Faded Lilac (I think…).  I really truly had decided to use a color with more gray in it, but I came home from the store with this paint color.  I really do like it, it’s just not what I had envisioned, but still quite lovely.

Catching up

So here we are the very last day of May.  Wow.  Hard to believe for so many reasons. 

  1.     Tomorrow is my 9th wedding anniversary!!  How is that possible??
  2. My oldest is finished with kindergarten…no way.  He cannot possibly be a first grader.
  3. We are heading out on vacation soon, very, very soon!!!!!!!!!!
  4. I haven’t posted anything since April.
  5. Baby #3 is due early this fall.  (Which partially explains my absence over the past few months.  pregnancy for me =SICK!!!)


I made some fun teacher gifts, and forgot to take pictures of them.  I did start taking pictures of the cookies that accompanied the gifts, just not the completed gifts!  They were really yummy sugar cookies though.


I made a new bag for a friend, hoping to make a new one for myself this week…we’ll see how that goes!  I can’t seem to make up my mind on what exactly I want my bag to look like.  I do fine when I’m making the decision for someone else.  I guess I just tend to over think my own purse, which means I never make one!


When we went to Germany last fall, my dear friend had this cool little thing for her daughter which my kids loved.  (It also kept them occupied in situations where they had to wait patiently, like waiting for food to arrive, etc.)  It was an “eye spy” bag, for lack of knowing what else to really call it.  So the constant crafter in me knew that I had to make some for the long vacation drive that is coming up.  I made them different so that if they want to switch they can, but I’m pretty sure that my son will want no part of the purple girly bag!


Let’s talk bags

Ok, I made lots of bags in the last year.  Many of which I never shared with you.  So here are some that I really like.

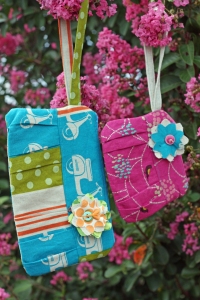
  These two wristlets were made from Echino fabrics.  The blue scooter one on the left is  Ni-co blue scooters, it’s an older print, and hard to find these days, but I love it.  The smaller one on the left is also made from Echino fabrics, you’ve probably seen this print before in some of my other bags.  It’s called Bird to hang in Raspberry.  I tried to find more of this back in December and had no luck.  I did find it in a laminated cotton, which is cool if you need that and don’t mind paying $26 a yard for it.  I love, love, love Echino fabrics.

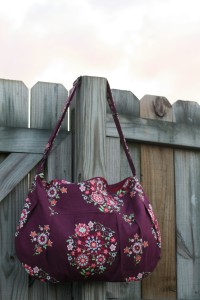
This bag was made for a dear friend of mine who is currently living in Macedonia.  She needed a big bag to carry books around town, and this bag was large enough to suit that need.  It’s made from Amy Butler fabric, part of her Love collection, it’s called Memento in burgundy.  It has an adjustable strap, I can’t remember if the actual pattern called for an adjustable strap or if I just added it to make sure that it worked for her.  It has a zipper and I added pockets on the inside so that she could keep things organized.

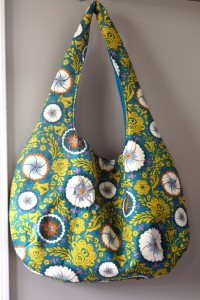
  This one is made using Alexander Henry fabric, Mocca in chocolate.  The pattern is Chic Hobo bag and you can find it here from I Think Sew.  (I like using these patterns, because you can download them and use them immediately.  I hate having to wait for something that I’ve bought online! I’m so impatient when I want to start a project. )  This bag is a great sized bag, it hangs really nicely.  Lots of room, so you can carry as little or as much as you want!  (I tend to carry lots of stuff.)

I liked this little clutch, it was sweet and simple.  It would be cute to carry around town or out for a date night.  I actually filled it with a couple of diapers and a wipes container and gave it to a friend to use as a travel diaper pouch.  The fabric is from Hobby Lobby, the pattern from I think Sew.  It’s the Gloria Clutches pattern, you can find it on the website as well.  It uses a magnetic snap. I was out of those so I just used velcro, it just made sense since it was being used to carry diapers.

  This is the only one of these bags that I still have.  I’ve never used it. I had intended to, just decided that I wanted something else.  It may find it’s way into the Etsy shop at some point.  (Along with many other things that I have never listed…)  The fabric is Anna Maria Horners’ Fortune, from the Good folks collection in sea.  I love this fabric, it’s so pretty.  I added some fun embroidery stitches to one of the flowers.  If I would have thought about it, I would have added embroidery to the entire side of it, but that idea didn’t occur to me until I already had it sewn together, and it was just too difficult to fit an embroidery hoop in most places.  The pattern is the Jasmine bag from here.

So…see, I may not post here frequently, but I am not just sitting around at home being totally useless!!  As if that’s possible when you have kids, right!?

My Current bag…

I have a slight addiction to making purses.  I love purses.  I always want a new purse.

So the other day I came up with this design.  It was a late night idea that turned out much better than I anticipated.  It has two exterior pockets as well as two interior pockets.  I added two additional smaller flowers on either side of the large one.    You’d think I would have taken a picture of the final product but no…

It’s a really big bag.  I don’t know that I will use it too long, because I really want something more spring-ish.  Some brighter colors.  Still on the search for the perfect fabric for that one.  I bought this brown bird fabric a few years ago, because it was just SO pretty.  It’s a decorator weight fabric by P. Kaufman.

I also made another bag a couple of weeks ago.  I had a sudden urge to do a little needlework around some of the flowers…LOVE the result.  Again, this was a really big bag, not sure that I will end up keeping it!  The fabric is from Good Folks by Anna Maria Horner.

Floor Pillows

My kids received these pillows a few years ago, they were Christmas gifts if I remember correctly.  They have been dearly loved, carried all over the house, stomped on, squished, slept on, etc.  I pick them up from time to time and think too bad the print isn’t cuter.  Well, today as I was pleading with my three year old to let me down size the number of stuffed animals (or “friends” as she calls them) that are currently occupying a huge space in her room, it occurred to me that I can change the fabric.  How have I not thought about this before??  I mean seriously, I can only take forest green and bears for so long.  What was the solution?  New fabric of course!  

I changed them to simple rectangular floor pillows, no more of those funky cylindrical things.  It was so easy to do, took about 5 minutes to sew both of them.  Longer to get those teeny, tiny, itty bitty little Styrofoam granules into the new pillows…so messy!If you are interested in making your own, all you need is a piece of 20″ fabric.  Fold it in half, right sides together.  Sew all sides with a 1/2″ seam allowance, leaving a 4-5″ opening.  Press, clip corners, turn right side out.  Press again.  Sew a half inch seam all the way around, except for the spot where you have left your opening, don’t sew that until after you have stuffed it!  So go ahead and fill it with whatever you are using to stuff it.  I filled mine about 1/2-2/3 full.  Sew the opening closed.  All finished!

My kids love them, they have carried them from room to room.  I love floor pillows.  I love cute fabric.  It makes me happy.  Anything to brighten one’s day, right?!

The $1 Skirt

Okay, so we (Mama #2 and I) were walking through Wal-mart yesterday when we saw 5 racks that were marked down to $1.  Not our typical place to shop for clothing, but when you see it’s only a dollar you have to stop and look, right?!  So it was mostly what you would imagine finding in the WM clothing markdown section…lots of comical things, but there was this denim skirt…that was kind of, sort of, maybe almost cute.  You know the kind, right?  You would only buy it if the price were awesome and you would definitely have to do something to it to make it wearable, but it has potential kind of thing.  Well this is what we found for that price, a (short) denim skirt.  Add a fun and colorful little ruffle to the bottom and here you have a new inexpensive skirt.  Throw on ap pair of colorful tights,like the ones that my husband says makes my legs look like an Avatar character (Love him!!)  and it’s a perfect fall skirt!

Sew Hip Kids

As you know, I love to sew and make things.  I’ve been selling my designs since 2007. This past weekend I was invited to sell some of my things at a small venue.  It was lots of fun, and I wanted to share some pictures with you.  I will be selling at another show in November and after that I will probably put some thing in my Etsy shop…so if you see anything you are interested in, let me know!

I had a variety of things that I make available on Saturday.  There were skirts and aprons.

This corduroy skirt, which happened to be my favorite, used brown birds from Robert Kaufmans Cool Cords line.  I made matching hair clips to go with the skirts.  I love them!!


You can see them in the top portion of the picture below.  I made them in a blue colorway to match the blue bird skirt as well.

These little apple hair clips are so cute!  I am seriously considering making one for myself.  Is that crazy?

This hair clip display board was made from an old ikea print that had ripped and landed in our trash pile.  I rescued it and stowed it away in a closet until it hit me that I could use it to display the hair clips.  I love this fabric.  It’s from Tina Givens Fairy Tip Toes line.

This little display stand is based on a really cool one that my friend B has.  (She also painted the sign hanging above for a show we did last year…she is SO talented!!)  It worked great for displaying this fun skirt.  Again, what would you think of a mommy sized version of this skirt?  I really want one…

There was even a little section of “gourmet” felt food items!  My kids play with felt foods I’ve made on a daily basis, in fact, they even snagged a pot and some pasta that I had intended to display on the little stove top!


I had a nice long nap after it was over.  Sunday had no plans, so we just stayed home and I attempted to make sense of the chaos that is my “sewing studio”

Simple Skirt

Remember the easy skirts from this post?  Well, today I am going to tell you how to make a really easy skirt!  If you have small amounts of fabric that you want to use, that are just under half a yard or so, try this, you will be happy with the quick and easy results!  You can make several of these in a short period of time.

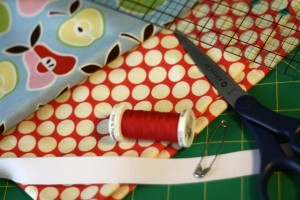
Here’s what you’re going to need…

  • Fabrics: 1 for the main part and one for the accent panel (if you want.)
  • elastic 3/4 to 1 inch wide (measuring the waist of the recipient subtract a couple of inches or so to find the length.)
  • thread, scissors, ruler, safety pin

To begin, measure your recipient and decide the length that you want the skirt to be.  For my skirt,  I want it to be approximately 14 inches long.    I am going to make the lower quarter of my skirt with a different fabric, so I need to determine how long to make each piece of fabric.  (You might want to make sure that you iron your fabric first, especially if you’ve had it folded for a while…probably should have done that before taking the picture!)

I will be using the entire 44″ width by 5″ for my accent and 44″ by about 13″ for the main panel.

Once I have those pieces cut, I am going to begin sewing.   I serged my two pieces together, sewing along the longest length,  if you don’t have a serger, just use your sewing machine.  You can allot an extra 1/2-1 inch if you want to fold the seem over to cover the unfinished edge.

Now you should have a one piece total.  Take the short sides and pin right sides together, serge or sew from one end to the other.  Back stitch on both ends.  It should now look like a tube.

Next get your iron and press fabric over a 1/4″ on the top edge and the bottom edge, making sure that you press the right side over the wrong side.

Now on the bottom edge, fold that pressed edge over again, another 1/2″ and press again.

On the top edge fold it over 1″-1 1/4″ depending on the size of your elastic, press.  This will make your elastic casing.

Now sew the bottom edge all the way around.

Sew the top edge, leaving a 2″ -3″ opening for the elastic.  Back stitch on both ends.

Attach your safety pin to one end of the elastic and feed it through the casing.

When you get back to the beginning, sew the two ends of your elastic together by laying one on top of the other and using a zig zag stitch go over it a few times for extra strength.  Now tuck it in to the casing and sew the opening closed.

You are all finished.  See how easy that was??

Now if you wanted to add a little more to this skirt, you could add a pocket or two onto the front.  Make them round or square, your choice, either would make a cute addition.

I think a little ruffle as the accent panel would be cute too.

Enjoy!  And please if you use one of the tutorials listed on this site, please give credit to the site.  Thanks.

Don’t forget to add yours to the Flickr pool.