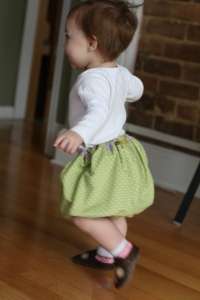
 I’m loving the bubble skirt trend right now. I don’t know what it is about seeing that puffy skirt on a little girl; it’s so sweet and innocent. Naturally, I had to make one. So here’s a little glimpse of the skirt. My little one would have no part in modeling this skirt, so Ms. C happily obliged for a few photos. She’s such a cutie!
Intrigued? Want to make one for your little one? (Or for yourself, don’t worry, we want one too!) Well, here’s a step by step guide to making one or four, once you start making them you may want to make a bunch of them! They are so simple to make! PLUS they’re reversible!!!
The Bubble Skirt:
Ok, so to begin you’ll want to measure your recipient. You will need to know the measurement from the waist to the knee (or however long you want it to be.) Add 1 1/2 inches to this and this will be the amount you need for the interior fabric length. For the exterior length you will want to add on about 3 1/2 inches and that will be the amount of fabric you need. You will also want to know the waist measurement for the elastic waistband. For a small child you can just use the width of the fabric, which is usually about 42-44″, if you are using a quilter weight cotton. It’s really just common sense, if your are making one for a larger size, just add additional fabric, you may want to buy a 1 1/2 yards and use the length of the fabric, not the width. Just remember, the more width the bunchier the skirt will be.
Now once you know these you will be able to figure out how much fabric you need.
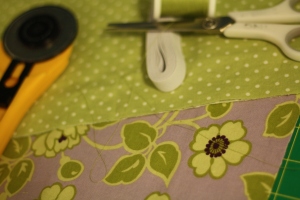
- Fabric one for the interior and one for the exterior. (1/2-1 yard or so of each depending on your measurements.)
- elastic 1 inch (enough for waistband) and also 30 inches of 1-4 inch. (add more if you are making it for a child over the age 5.)
- thread, scissors, iron, ruler
To begin:
Cut out your fabric using the measurements that you recorded earlier. You should have two large rectangles.
With right sides together, line up the short edges of one piece and sew a 1/2 inch seam. Back stitching at the beginning and end. Now repeat with the other fabric.
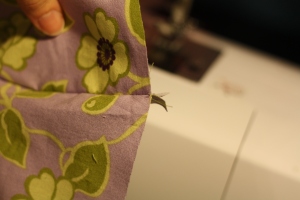
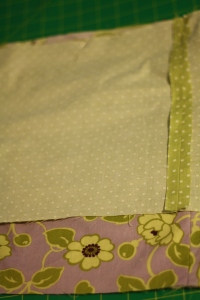
You should have two tubes. Good job. Now insert the larger tube inside the smaller one with right sides facing each other.
Line up the bottom edges and pin all the way round.
Sew your seam close to the edge, about 1/4 inch or so, all the way around. Now sew another seam about 3/8 to 1/2 inch from the first seam, ( it needs to be big enough to fit your 1/4 elastic through.) leaving an opening to feed the 30″ piece of elastic through.
Now using a safety pin attached to the end, feed your elastic through the casing you just sewed. Once it’s through, sew the two ends of elastic together. Tuck it in and sew the opening closed.
Congrats you’re halfway there. You just finished the bottom bubble part of the skirt!
Next flip your skirt right sides out. Your main fabric will be longer than the lining fabric.
 Take the edge of your main fabric, fold it over about 1/2 inch and press.
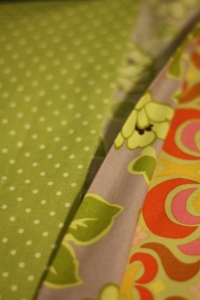 Now take that pressed edge and fold it over so that it covers the lining part.
 Make sure that your edge covers the edge of the lining fabric. I made sure that the two raw edges were aligned as I pinned them together.
 I stitched as close to the edge as possible all the way around, leaving an opening for the elastic.
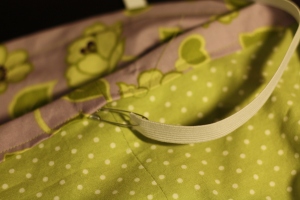 Feed your elastic through just as you did on the bottom part.
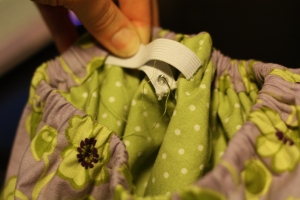 Once again bring the two ends together. Sew. Tuck into the casing. Sew the opening closed.
You are finished!!!!
If you wanted, you could add a little bow or some type of embellishment to the waistband or anywhere really.
Hope you enjoy your new creation!!!
Don’t forget, we’d love to see what you’ve made…please upload a picture to our Flickr group.





so cute. i will def try this one. i might need to come shopping in your fabric closet though 🙂
Any time Bonnie!!!
Very cute!
It turned out just adorable!
Thanks for taking part in Talented Tuesday at My Frugal Family! Don’t forget to come back next week!
Thanks, I’m happy to have stumbled upon it!!
Looks great Kara!!!!
How totally bubbly and cute! What a nice tutorial too!
Love that baby gurl! She’s a cutie!
HUGS!
Thank you, and thanks for stopping by!!
This is fantastic! And I love that it’s reversible! Thanks so much for sharing this, I’ll be linking.
Thanks so much! I love your round ups!
Love it!
Beautiful skirt! I really want to make one. Question: how wide is your skirt before gathering with the elastic? Thanks.
Hi, the skirt was the width of the fabric from selvage to selvage (folded in half) minus the seam allowance. Does that make sense? Basically, it was as wide as the fabric that you are using. So it’s perfect for a little girl.
I love, love, loved this… so very easy to follow along. Thank you so much for sharing. My miss Ashelyn thought it was soooo coot!
Bubble skirts are so cute! Thanks for the tutorial! If you are interested, I’ve started a new Thursday Linkup called Make it, Wear it. Stop on by and link up!
Thanks! I will check it out!
AWESOME! What type of fabric? cotton?
You could use lots of different fabrics, I used cotton for the one pictured.
Awesome! Thank you for the instructions,
so glad I came across your blog!
I’m glad you like it!! 🙂
love this so much! posted it on PB today.
Thanks so much!!
Pingback: » The SewStorm (Part 1)
Pingback: » My Creative Space: Revelations
I tried to make this, but my bubble didn’t turn out very well. It isn’t very gathered along one side on the bottom. Did I make my casing too small? I can’t move the elastic around very easily on the bottom. Is there any way to fix this? I have already finished it… 😦
What length of fabric did you use? Was it longer than a 44″ piece, that would affect it. Or maybe your casing is a little too snug if you can’t move the elastic freely. I ripped my first one apart (what felt like) a million times when I was trying to get it the way I wanted it. I’m sorry for the frustration. I wish I could take a look at it and tell you more!!
Pingback: Bubble skirts |
Thank you so much for this, I made one for my daughter using your tutorial, I added a ruffle at the top of the skirt. It turned out so cute and she loves it!
Sounds cute!! I’m glad you enjoyed it!
Thank you for the tut! I loved making this one! It was so simple and I can’t wait until my dd wakes up so that I can snap a photo of her in it. I strayed a bit from your tutorial when I got to the waist band (I really liked the fabric and didn’t want to waste it all on the interior). I added another strip and seamed it in to the top outer layer than made my casing from there. Thanks again!
So you need a one-inch piece of elastic that measures the same as the waist measurement of the recipient and 30 inches of quarter-inch elastic? Just trying to make sure I got this right…
Yes, the one inch is for the waist band, the 1/4 inch part is what will create the bubble effect. Hope this helps, let me know if you have any other questions!
Hi, I love this skirt! I am a beginner and I’m not sure I understand the measurements.I got the length but not the width. I made one skirt but it looks more like a “pencil” skirt. 🙂 How wide were your measurements. The waist of mine will be 18 inches.
The measurement is going to be the width of your fabric. My fabric was about 44″ wide, so that’s what I used for the width. My main piece of fabric was 44″ wide by _” (the desired length of my skirt). I hope this helps, if not, send me a message and I can try to explain it further! Good luck!!
That was my question. I made a skirt that won’t even fit around my baby’s legs… It doesn’t mention in the tutorial to use the width of the fabric. Thanks for the question!
Sorry. I haven’t checked the blog comments in a while. Yes, you need to use the width of the fabric. Smaller amounts are obviously not going to make a full skirt.
Thank you so much for this tutorial! I am adding the bubble hem to a dress I made for my little one!
I LOVE this tutorial! I whipped one up in no time today and can’t wait to show it to my daughter when she gets home from school! 🙂 I’ll definitely be doing more in the future! 🙂
Glad you liked it! I would love to see pictures!
I just uploaded them here 🙂 Theresa (6yo dd) LOVED it, and said that it was “dressy” and “playful” in one! 🙂
Oops! Here is the link
Can someone please clarify something for me?
“You will need to know the measurement from the waist to the knee (or however long you want it to be.) Add 1 1/2 inches to this and this will be the amount you need for the interior fabric. For the exterior you will want to add on about 3 1/2 inches and that will be the amount of fabric you need. ”
Does this mean add on 3.5 inches to the ORIGINAL measurement or the interior measurement? I did it to the original measurement, but it looks different from the picture…
Hi there! I’m sorry for the confusion. You want to add the 3.5 inches to the original measurement for the exterior fabric. The interior fabric should only have about 1.5 added to it. This will help create the bubble effect once the elastic is added later on. Let me know if you need any more info! Hope this helps.
Thanks so much for the cute tute! I made one for dd7 today with some Xmas fabric. My only question is: How do you give the skirt more volume? I used cotton fabric and the skirt just doesn’t seem that poofy.
If she is seven, you will probably want to make the skirt a little wider, so I would add more fabric to the measurement. I used 44″ fabric for my 3 year old, so I would add more until you get it to a nice puffy shape. Maybe 10-15 inches more? You’ll want to add extra elastic to the bottom as well, to compensate. Hope this helps.
I’m making this for my 16month old and I bought fabric that is 60″ wide. Do you have a suggestion on how long I should make the elastic in the bottom? I know I could cut my fabric down to 44″ but I would prefer to leave it 60″ wide. Thanks for your help!
Hi, my guess would be to add an extra 10″ or so. You can experiment with it before you cut the elastic, just feed it through the hem casing and see if you like the fullness of it, add more or take away some of the elastic until you get it the way you like it. Hope this helps!
Thank you so much for this tutorial. I have been searching online for the perfect bubble skirt tutorial. Hands down yours is the best. It simple to the point and the best part……you get two skirts. I made two of them this week for my tweens. Thanks so much from a mother who is new to sewing!!!!!!
How sweet, thank you so much!! I’m so glad you enjoyed it!
Tween Bubble Skirts
http://www2.snapfish.com/snapfish/thumbnailshare/AlbumID=4449619020/a=4364268020_4364268020/otsc=SHR/otsi=SALBlink/COBRAND_NAME=snapfish/
Modified it for dolls! Thanks for the great idea/inspiration! http://www.flickr.com/photos/maizymooknits/6881776416/in/photostream
Oh my goodness, that is SO cute!!!!!!!!
Hi Kara, just stumbled upon your blog while searching for an easy bubble skirt tutorial. Wanted to ask though do you your exact waist measurements while making a bubble skirt or the bigger the better the poof when you add elastic to it..thanks
P.S That skirt just looks adorable:)
Not sure that I totally understand your question! The lower elastic needs to be big enough to allow for free movement, but not so big that it’s too loose and won’t poof. Does that make sense?
Yeah it does make sense. I wanted to know the size of the lower elastic, and thanks for clarifying that for me.
Hi, I’m going to try this for my little one but just cursious, can you make this for adults, too? I’m wondering how I can figure out the length of the 1/4″ elastic for the bubble if I was to do this for a grown up.
I have made skirts similar to this for myself, but not as a bubble skirt. I would make sure that the elastic is not so tight that it would impede your movement or be uncomfortable in any way. I would love to see a finished picture if you make an adult version!!
Thanks for the great tutuorial, just finished my first bubble skirt thanks to you. The only instruction I was confused about was how long to make the width of the rectangles, but I just did 1.5 times the waist and it worked great.
Great!!!
Hey, I just finished one of these & love it. I did have to read all the way through the comments to understand that you meant to use the whole length of the yard of fabric (after you cut for the length). You may want to clarify in the tutorial. Thanks so much for putting it up for us! My daughter is going to love it!
Thanks. I updated it! Yes, it takes reading through it a hundred times to notice that when you know it by heart!